
If you wish to understand how I take advantage of Lightroom Earlier than and After performance in my pictures and the way it helps me visualize my edits, you could learn this tutorial.
To make use of Lightroom earlier than and after characteristic, bounce to the Develop module first and use the “” keyboard shortcut to preview the unedited model of the chosen picture. In the end, you press ‘Shift+Tab” first to cover modifying panels after which hit the “” key to make use of the earlier than and after in unobstructed full-screen mode.
When you ask me concerning the Lightroom software or operate that I take advantage of most frequently, you’ll be shocked by my reply. It isn’t Break up Firming or Panorama Merging, neither is it a preset performance. The obscure Earlier than and After characteristic is my reply.
I’m not saying it’s the most helpful or probably the most thrilling software, however it’s the software I take advantage of most frequently throughout modifying.
While you shoot in RAW format, the photographs straight from the digital camera are usually not very thrilling or interesting. By design, RAW photos are low in distinction and saturation; the collected uncooked knowledge have to be processed first.
The transformation from the unique RAW seize to the ultimate, ready-for-publishing picture may be drastic. I discover it’s simple for me to get carried away and overprocess a picture when working in Lightroom.
See additionally: Learn how to Duplicate Picture in Lightroom
That’s the place the Earlier than and After characteristic comes into play. The operate serves as a actuality verify and helps be sure that I’m on the correct modifying observe. When I’m within the means of modifying, particularly when modifying a photograph that has the potential of changing into a portfolio piece, I take advantage of the Earlier than and After operate each couple of minutes.
There are various alternative ways of utilizing Earlier than and After in Lightroom, however I solely frequently use the operate in two particular methods.
Utilizing Lightroom Earlier than and After Characteristic
In in the present day’s article, I’ll present you the way I take advantage of Earlier than and After in Lightroom and the assorted different methods you need to use the operate in your modifying workflow.
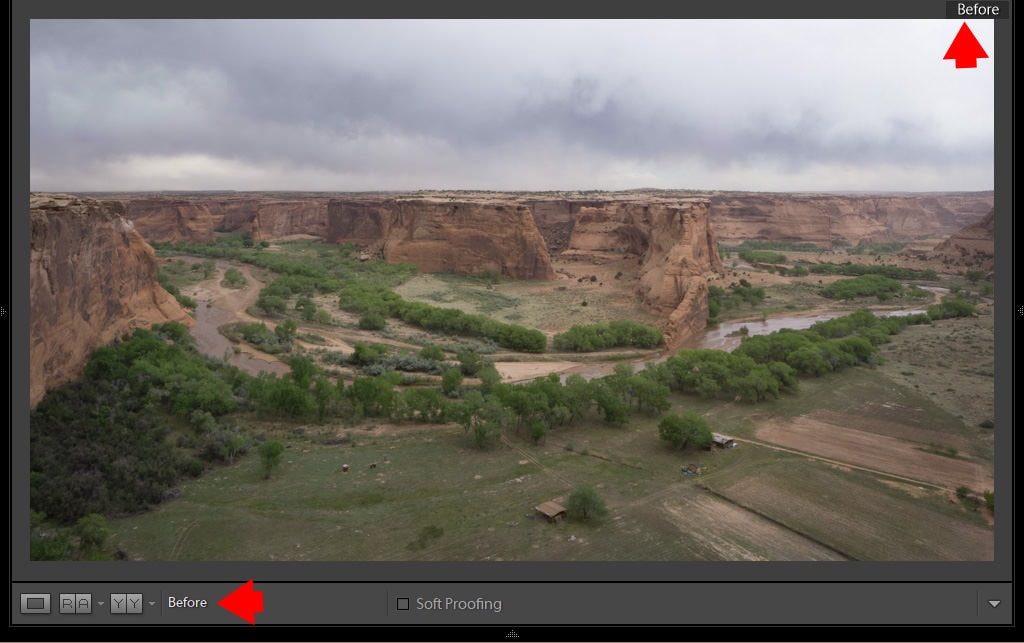
1. Earlier than Solely
That is the best manner of displaying the unique, unedited state of the chosen photograph.
Hit the “” key in your keyboard, and the chosen picture is changed with an unedited model of the identical photograph.
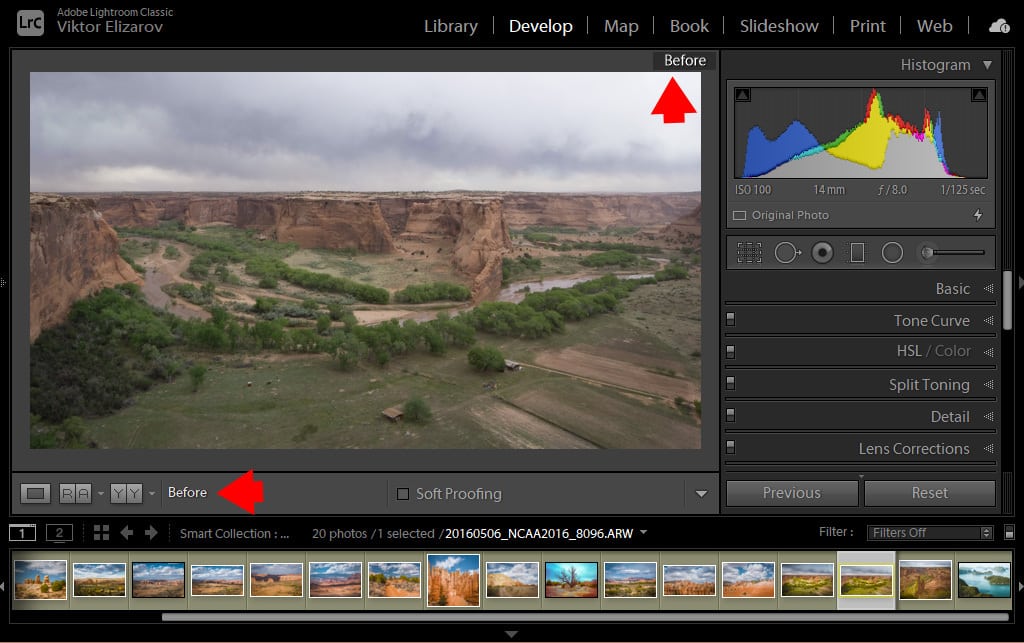
This doesn’t change the Crop Overlay changes; the picture within the “Earlier than” state has the identical dimensions.
By hitting the “” key as soon as extra, the picture is changed with the presently edited model.
I usually hit the keyboard shortcut 4 to five instances earlier than deciding on my modifying–if I have to dial it down or push my modifying even additional.
Here’s a variation of the identical methodology that I typically use.
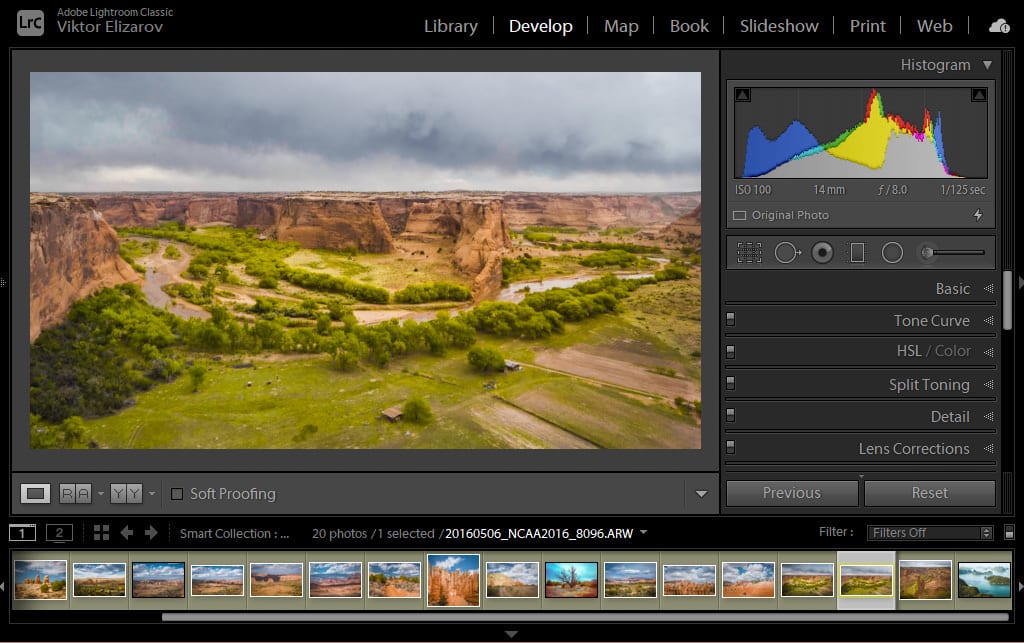
I discover that one of many most helpful shortcuts in Lightroom is the “Full Display” shortcut. By urgent the “F” key, the chosen picture goes into full-screen mode and covers the whole monitor. I typically use this software to judge the edited picture in a view unobstructed by the Lightroom consumer interface (UI).
Sadly, the “Earlier than Solely” characteristic doesn’t work in full-screen mode. While you use the “” key in full-screen mode, it instantly goes again to the usual Lightroom interface.
Right here is how I work round this limitation:
First, I take advantage of the “Shift + Tab” shortcut to inform Lightroom to cover all its panels (high, backside, left, and proper). This maximizes the UI actual property for the chosen picture.
Subsequent, I take advantage of the “” key to show the unedited model of the chosen photograph.
2. Earlier than and After with Snapshot Panel
I discover that the Snapshot Panel is an underappreciated and underutilized characteristic in Lightroom. I do know {many professional} photographers who by no means use it.
I really like the Snapshot software and use it with almost each picture I edit in Lightroom.
Snapshot means that you can save any modifying occasion from the Historical past Panel as a snapshot.
Let me present you the way my Snapshot Panel appears to be like for considered one of my processed images.
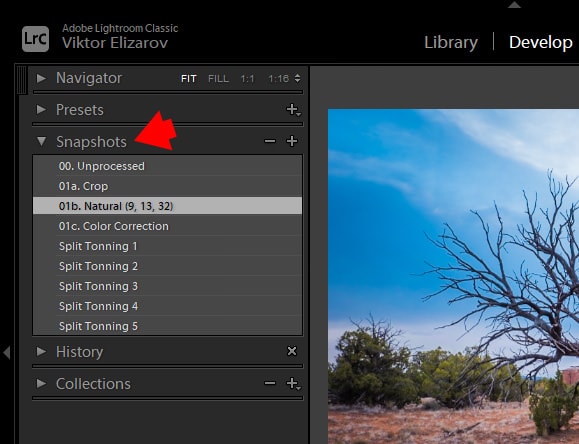
00. Unprocessed – I created the Snapshot or occasion of an unprocessed RAW picture originally of my modifying.
01a. – I used the Crop Overlay software to enhance the composition by making it a bit tighter. Then, I created one other Snapshot.
01b. Pure – The Snapshot tells me that I used the Pure preset and three changes from the TOOLKIT.
01c. Colour Correction – I created the following Snapshot after I used the Lightroom modifying sliders for handbook shade correction. I desaturated the sky space and emphasised the vegetation areas.
Lastly, I created 5 extra Snapshots for 5 modifying variations that I made utilizing the Break up Firming Panel in Lightroom.
The Snapshot setup permits me to leap to the unique, unedited model of the picture and the assorted intermediate states throughout the modifying course of.
One other advantage of the Snapshot software is that after I open the identical picture later, even months or years into the long run, it can assist me higher perceive the prepare of thought current throughout the modifying course of.
As I discussed earlier than, the Snapshot Panel is an important a part of my Lightroom modifying workflow.
Subsequent, I’ll present you a number of different methods to make use of Lightroom’s Earlier than and After operate. Though I don’t use these strategies typically, they are often helpful generally.
Lightroom has a complete Earlier than and After operate that you could entry via the UI, keyboard shortcuts, or the primary menu.
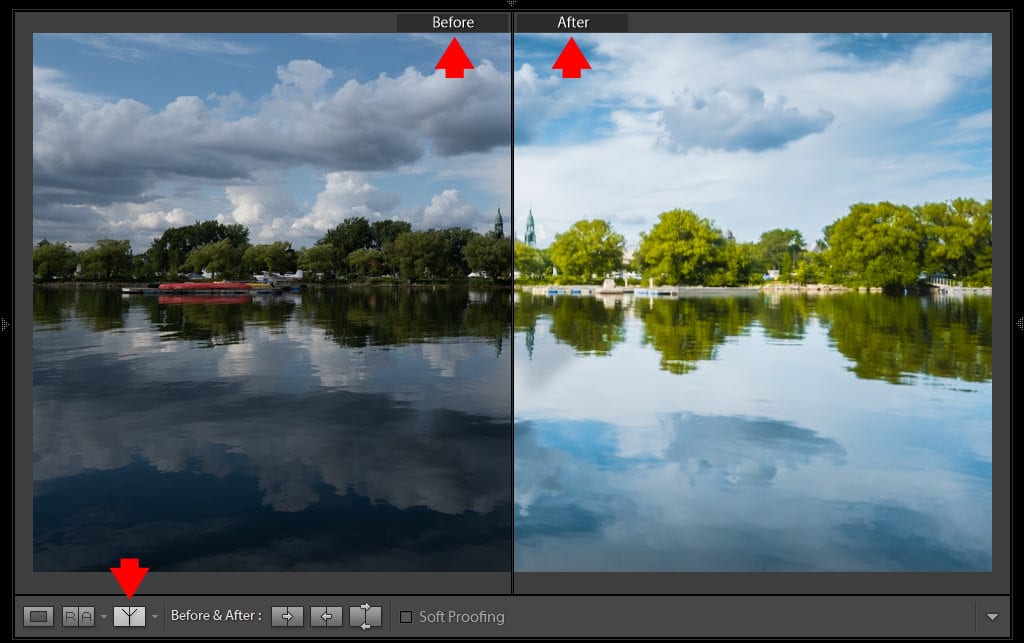
3. Earlier than and After Left/Proper
If you wish to show the present modifying state of the picture subsequent to the unedited model in a side-by-side comparability, listed here are your choices:
a. Use the “Y” shortcut.
b. Click on the YY icon beneath the picture.
c. Use the highest menu View > Earlier than/After > Left Proper.
I discover this explicit view to be probably the most helpful. However the side-by-side view may be too small for correct analysis if you edit images within the panorama orientation.
In these cases, use the trick I outlined above.
- Use the “Shift + Tab” shortcut to cover all of the panels in Lightroom and maximize the UI.
- Subsequent, use the “Y” shortcut to entry the Earlier than and After side-by-side view.

4. Earlier than and After Left/Proper Break up
The cut up view is a variation of the Left/Proper possibility, however as a substitute of two photos displayed side-by-side, one picture is cut up in half with the unedited half of the picture on the left and the present, edited half of the picture on the correct.
a. Use the “Shift + Y” shortcut.
b. Choose the “Earlier than/After Left/Proper Break up” possibility below the YY icon.
c. Use the highest menu View > Earlier than/After > Break up.
I by no means discovered this cut up view to be very helpful, however this selection is obtainable in the event you want it.
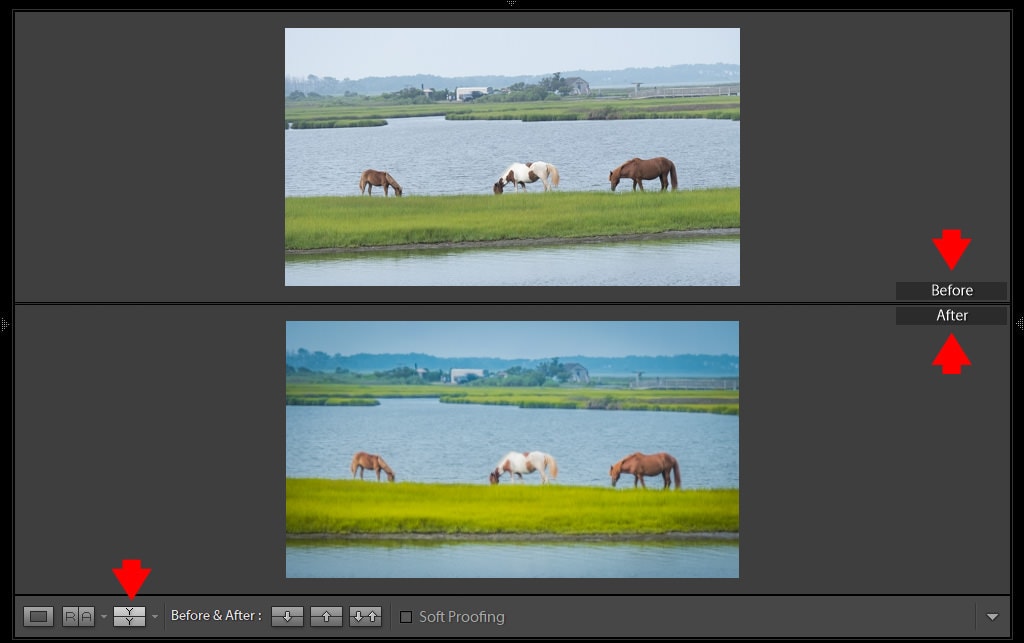
5. Earlier than and After High/Backside
Right here is one other variation of the side-by-side possibility however with the photographs displayed in a vertical orientation from high to backside.
a. Use the “Alt + Y” shortcut.
b. Choose the “Earlier than/After High/Backside” possibility below the YY icon.
C. Use the highest menu View > Earlier than/After > High/Backside.
6. Earlier than and After High/Backside Break up
This is identical concept because the Left/Proper Break up, however the cut up is positioned horizontally.
See additionally: Luminocity Masking in Lightroom
a. Use the “Alt + Y” shortcut to entry the highest/backside view. Then, swap to separate utilizing the “Shift + Y” shortcut.
b. Choose the “Earlier than/After High/Backside Break up” possibility below the YY icon.
C. Use the highest menu View > Earlier than/After > Break up.

Further Choices
By default, the “Earlier than” state is displayed on the left when utilizing the side-by-side structure (or on the high within the top-to-bottom structure). You’ll be able to swap the Earlier than and After default show choices utilizing:
a. The Swap View icon below the picture.
B. “Ctrl + Alt + Shift + Arrow Up” (“Cmd + Choice + Shift + Arrow Up” on Mac).

While you use any of the Earlier than and After choices, the default view shows the unique, unprocessed picture with the present edited model. However you aren’t restricted to solely the default views.
See additionally: Learn how to Use Histogram in Lightroom
While you open the Historical past Panel and drag any of the modifying steps from the Historical past Panel to the Earlier than picture, the default unprocessed view modifications to the chosen modifying step.
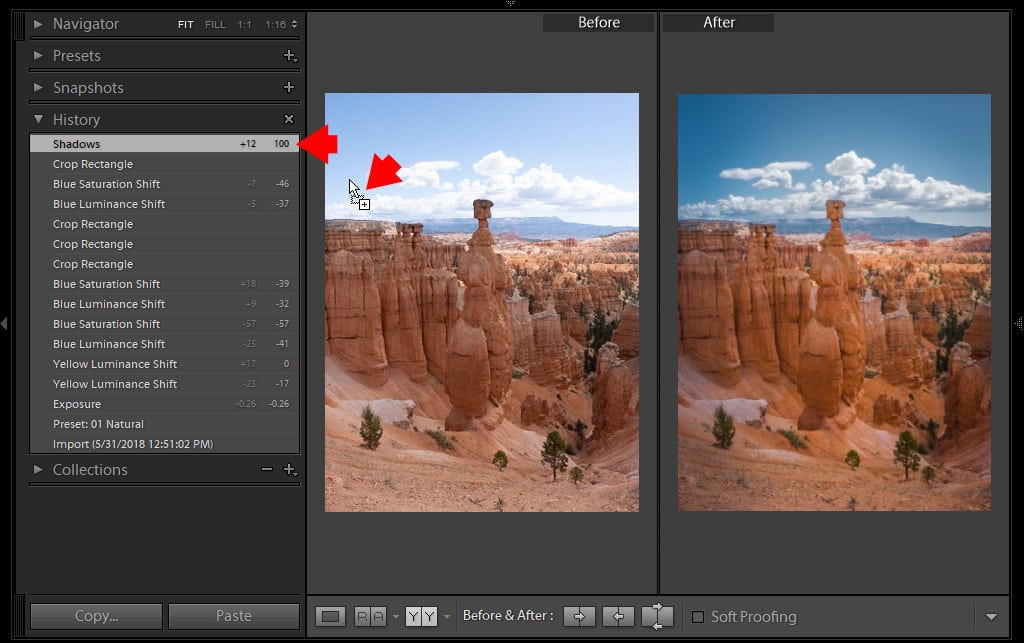
As soon as once more, I’m not positive how helpful this characteristic is, however you could have the choice in case you ever want it.
7. Utilizing Digital Copy to Show Earlier than and After
The Digital Copy operate in Lightroom means that you can create cases of edited images with out duplicating the unique picture. You’ll be able to apply completely different modifying choices to every Digital Copy to separate the assorted modifying variations.
Ctrl + ‘ (apostrophe)(Cmd + ‘) – to create a Digital Copy of the chosen photograph.
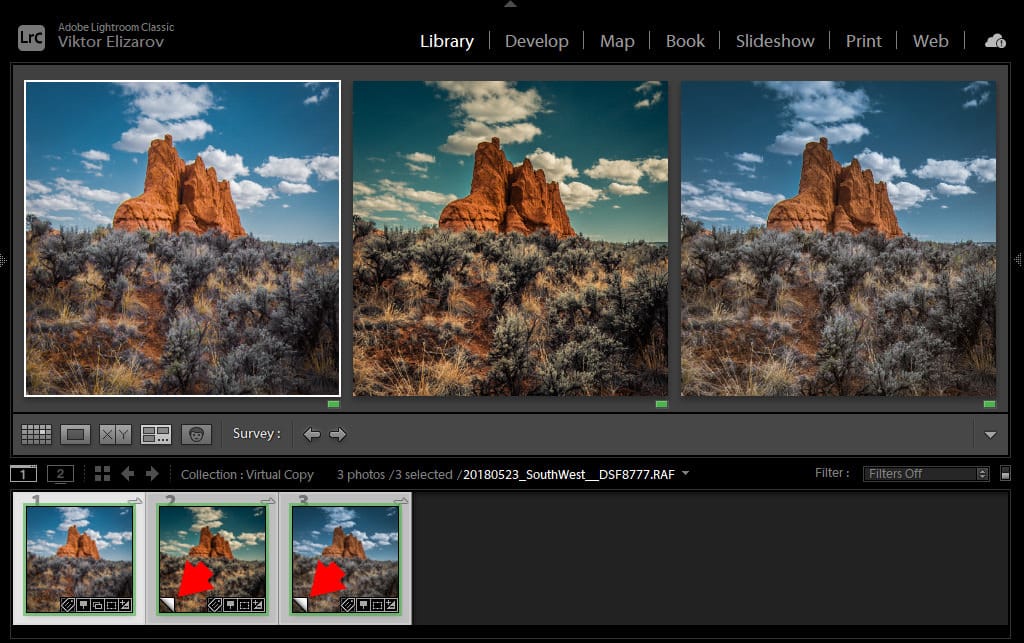
Utilizing the Earlier than and After possibility with Digital Copies is just like how I take advantage of Snapshots. As a substitute of utilizing Snapshots, you merely use Digital Copies to trace your modifying steps.
Lightroom Earlier than and After Shortcuts
“” – replaces the present modifying state with the unique unedited model.
Shift + Tag, “” – a mix of shortcuts hides all of the panels first.
“Y” – shows Earlier than & After Facet by Facet.
“Shift” + “Y” – shows Earlier than & After Left/Proper Break up.
“Alt”+”Y” – shows Earlier than & After High/Backside
“Alt”+”Y” and “Shift + Y” – shows Earlier than & After High/Backside Break up
“Ctrl” + “Alt” + “Shift” + “Arrow Up” – Earlier than & Afte Swap View
Lightroom Earlier than and After | Closing Ideas
As you’ll be able to see, Lightroom provides a number of choices to show the earlier than and after states of the edited picture. However, you should not have to memorize all of them. The purpose is to search out probably the most helpful choices to your particular workflow and to stay with them.
In my case, I nearly solely use choices #1 Earlier than Solely and #2 Earlier than and After with Snapshot Panel.