
It’s onerous to overestimate the significance of keyboard shortcuts in Lightroom or in another modifying program. Shortcuts assist us pace up and optimize our modifying workflow. You will discover the tutorial devoted completely to essentially the most helpful keyboard shortcuts in Lightroom right here.

There are additionally keyboard keys that don’t act precisely as shortcuts as a result of they work together with current instruments and serve the aim to change or lengthen their default features. I name these “Keyboard Modifiers.”
One of the crucial highly effective keyboard modifiers in Lightroom is the Alt (PC), Choice (Mac) key. By utilizing the Alt/Choice key in numerous areas of Lightroom, we will lengthen this system’s usefulness and even the practical vary of the varied modifying instruments.
In as we speak’s tutorial, I’ll clarify how one can lengthen the performance of various areas of Lightroom utilizing Alt/Choice keyboard modifiers.
Develop Module
I all the time begin with the Develop Module as a result of that is the place I spend the vast majority of my time. It is usually the place the Alt/Choice modifiers are essentially the most helpful and efficient.
Solo Mode
Within the Lightroom Develop Module, there are 9 essential modifying panels. If you open all of those panels, it’s simple to get misplaced endlessly scrolling as you attempt to discover the precise modifying slider to your wants. Solo Mode helps you get rid of litter by permitting you to have just one modifying panel open (prolonged).
When Solo Mode is lively and also you open any of the modifying panels—just like the Break up Firming, for instance—it closes all the opposite panels. Solo Mode is essentially the most helpful when your display screen actual property is restricted like when utilizing a laptop computer.
To activate Solo Mode, press the Alt/Choice key and click on the header of any modifying panel. To deactivate Solo Mode, preserve the Alt/Choice key pressed and click on any of the modifying panels once more.
I take advantage of Solo Mode 99% of the time, even once I use a desktop pc with a big monitor. Solo Mode retains my UI neater.
Now, let’s dive into every modifying panel and the instruments within the Develop Mannequin to see how we will lengthen their functionalities by utilizing the Alt/Choice modifiers.
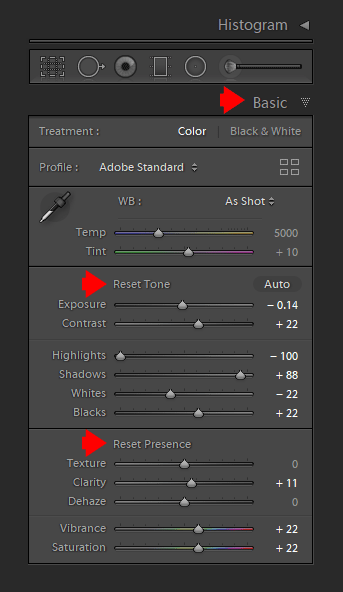
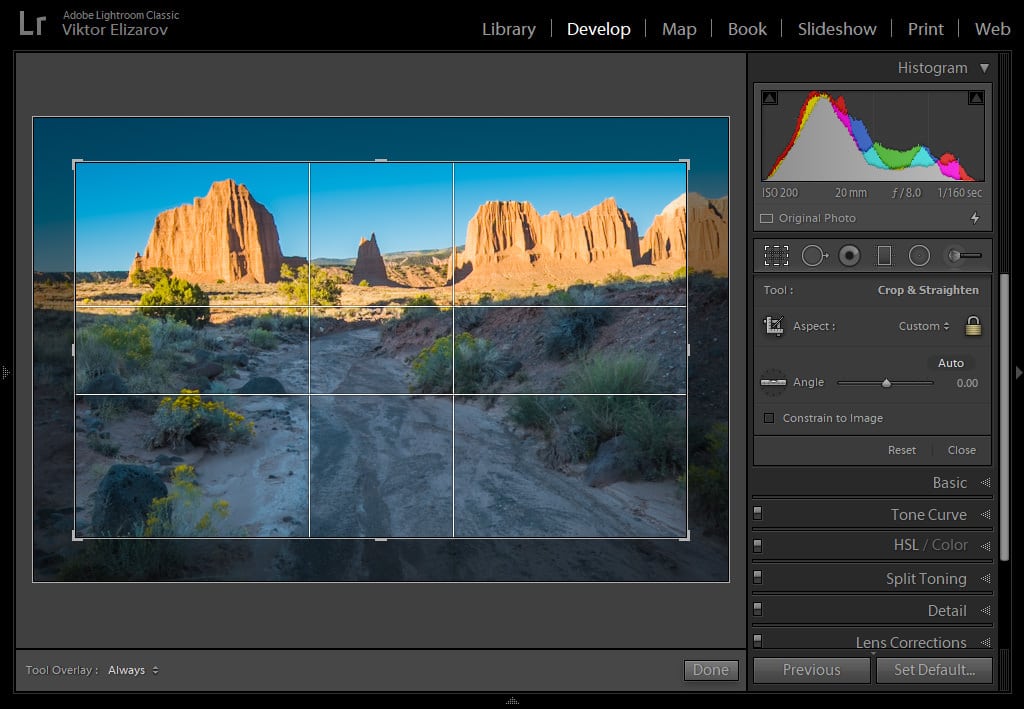
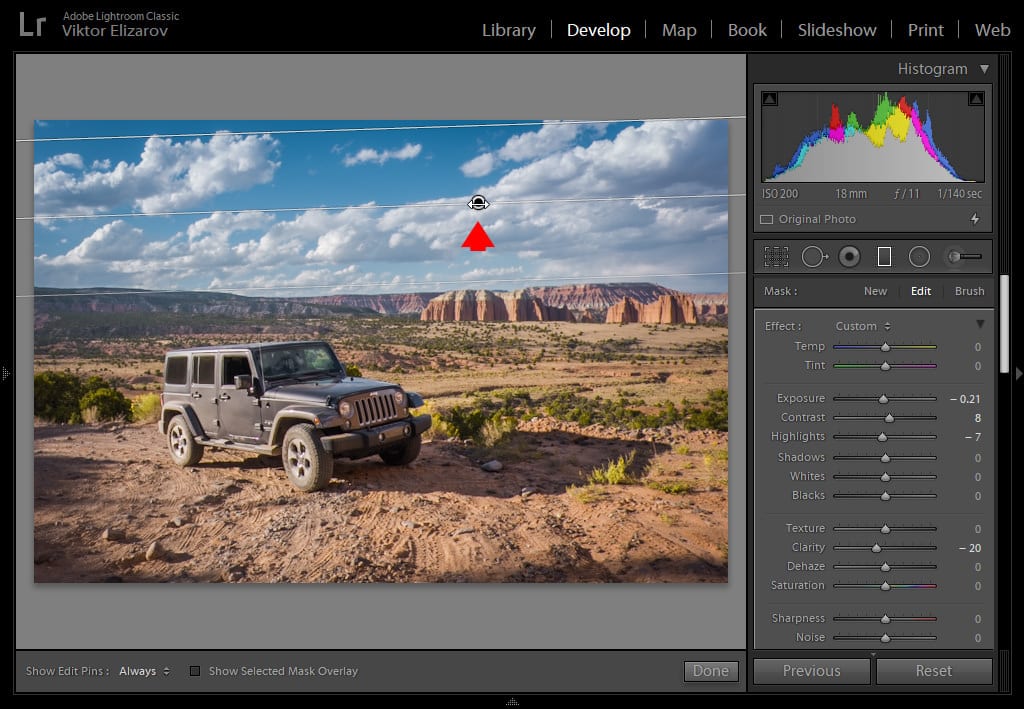
The Primary Panel
Reset Sliders
The most typical and hottest use of the Alt/Choice secret is to reset a number of modifying sliders to their default values. This performance works in nearly all of the panels together with the Primary Panel.
By holding the Alt/Choice key down, the brand new choices (Reset Tone and Reset Presence) seem. By clicking the “reset choices,” you’ll reset all of the modifying sliders to zero.
Present Spotlight Clipping
By holding down the Alt/Choice key whereas dragging the Publicity, Highlights, or Whites sliders, you may see if any areas of the photograph have clipped highlights.
The white space of the preview signifies that each one three coloration channels (purple, inexperienced, blue) are blown.
The purple, inexperienced, and blue areas present that just one channel is clipped.
The cyan, magenta, and yellow areas point out that two out of three channels are clipped.
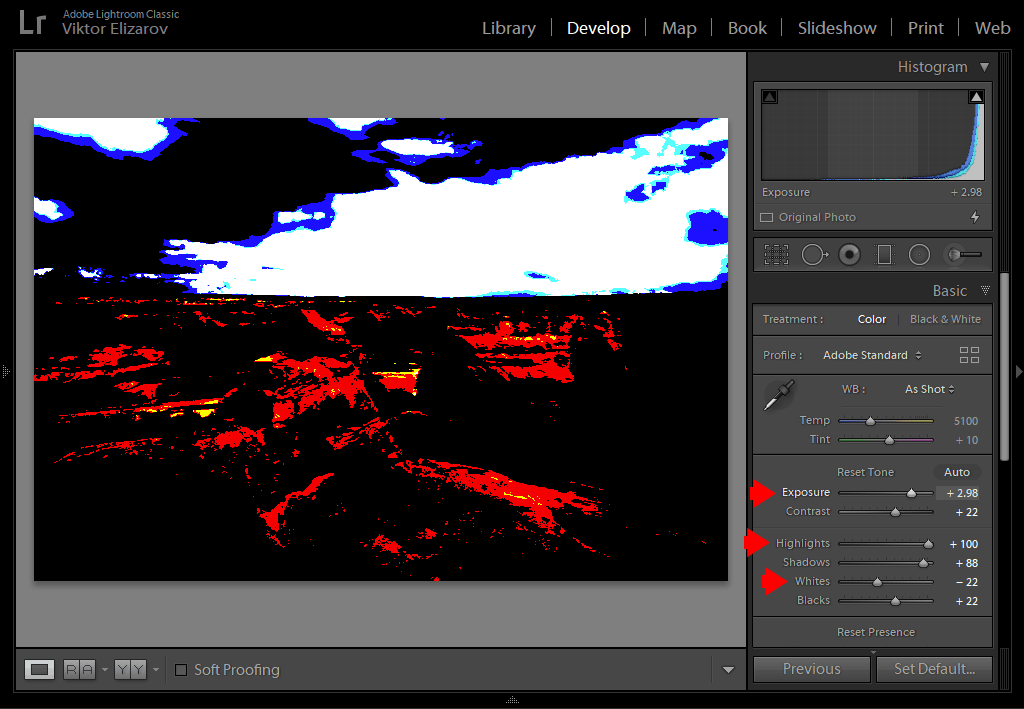
This performance is extraordinarily helpful when evaluating if the overexposed areas of the picture might be recovered. As a normal rule, if just one channel is clipped, there’s a good probability of recovering it. However when two or three channels are clipped or blown, you’re probably out of luck.
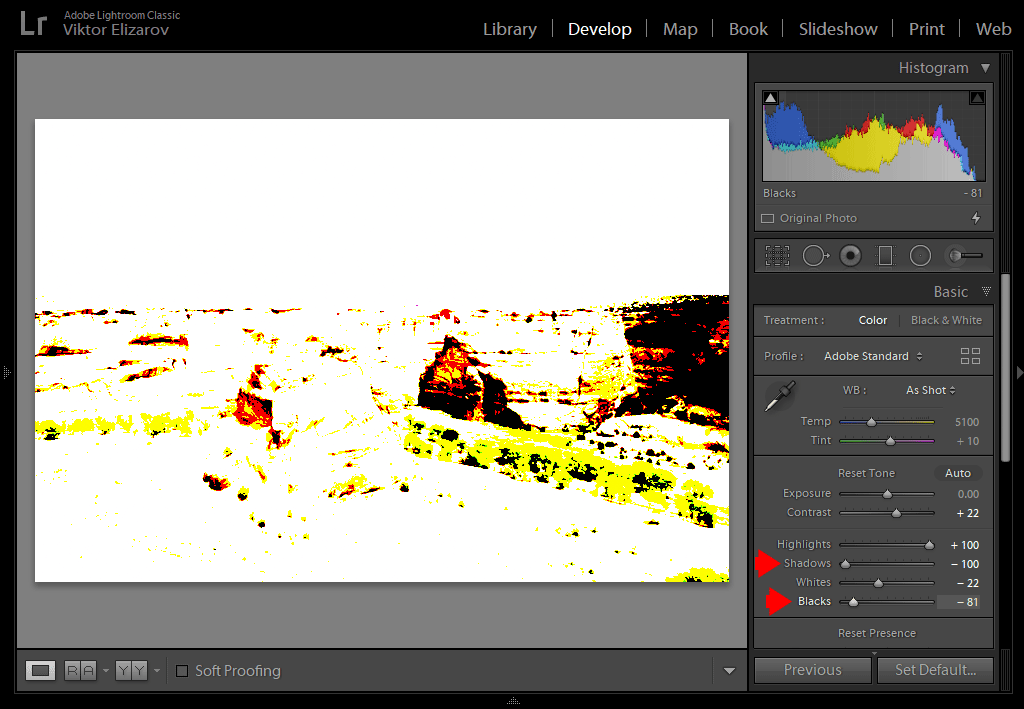
Present Shadow Clipping
By urgent the Alt/Choice key whereas dragging the Shadows or Blacks sliders, you may see the areas of the photograph with clipped shadows.
The black areas of the picture point out that each one three coloration channels have clipped shadows.
The purple, inexperienced, and blue areas point out that just one channel is clipped.
The cyan, magenta, and yellow areas point out that two out of three channels have clipped shadows.
The Tone Curve Panel
Within the Tone Curve Panel, you may modify the tone curve by utilizing the Area Sliders. When you want larger precision, you may edit the tone curve immediately by altering the form of the curve for the person coloration channels (purple, inexperienced, blue) or the mixed channel.
Reset Area Sliders
By urgent the Alt/Choice key when utilizing the Area Sliders, you may entry the choice to reset all 4 Area Sliders to the default values (zero).
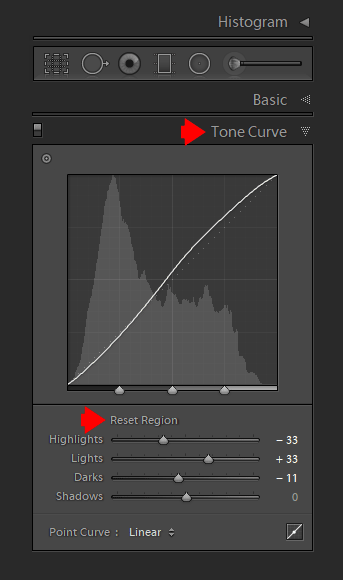
Entry Superb Tune Changes
When modifying the tone curve immediately, the Alt/Choice modifier works in a different way. The Alt/Choice key adjustments the sensitivity of the mouse motion and means that you can make extra refined changes. This works extraordinarily nicely when mixed with the Shift key, which constrains the mouse motion to solely the Y-axis.
HSL/Shade Panel
Within the HSL/Shade Panel, the Alt/Choice modifier has just one perform—it resets the modifying sliders to zero. The panel has 24 whole modifying sliders. It might be a chore to reset them one after the other.
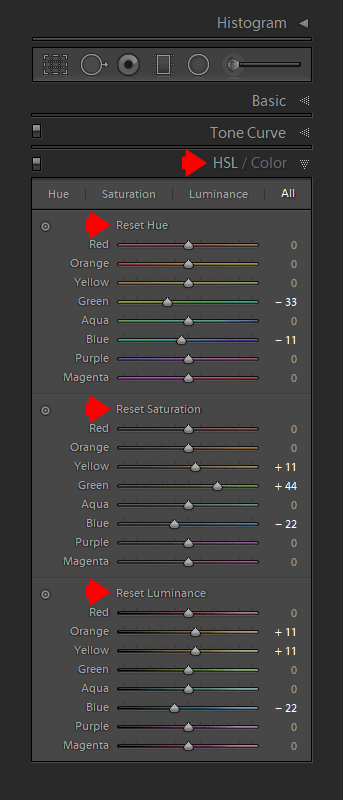
That is the panel the place I take advantage of the reset choices essentially the most typically.
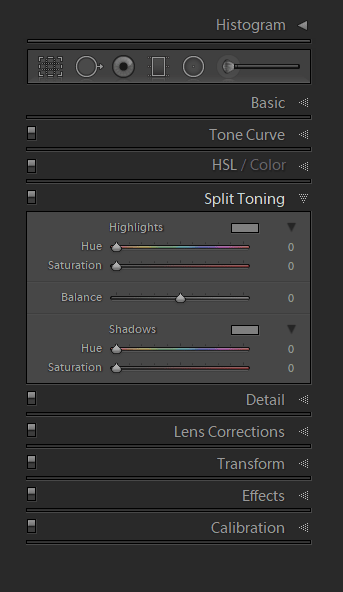
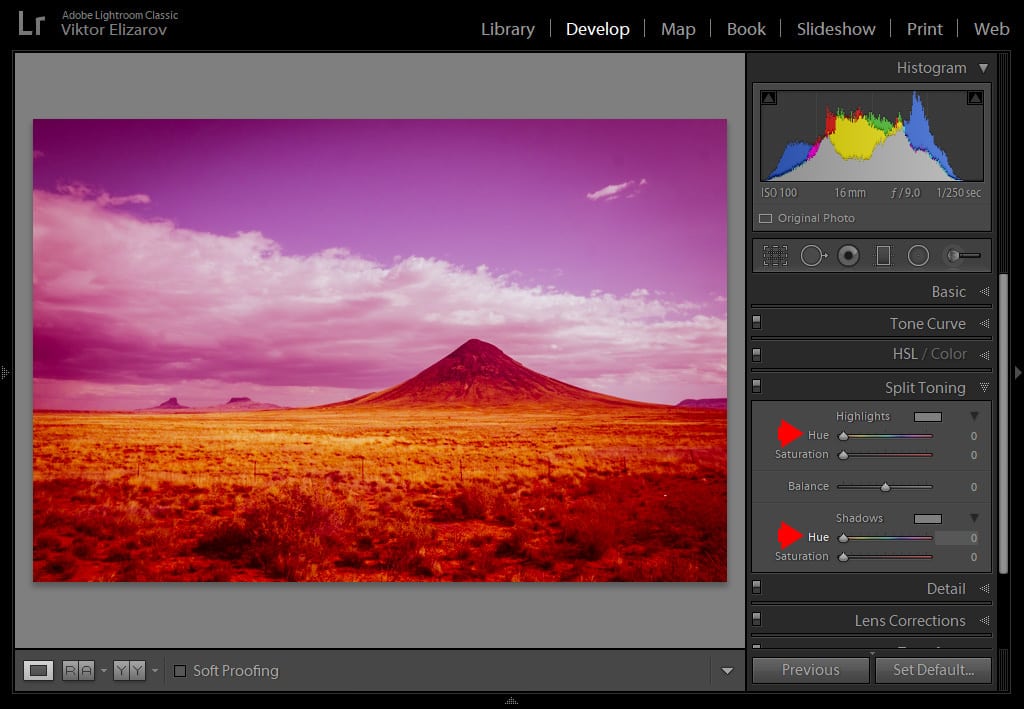
Break up Firming Panel
You may reset the Highlights and Shadows whereas holding down the Alt/Choice key.
Visualizing the Break up Firming Impact
Maintain down the Alt/Choice key whereas shifting the Spotlight Hue or Shadow Hue sliders to see the colour you chose at 100% saturation earlier than you dial it up. As soon as once more, this can be a very helpful visualization device that I take advantage of very often.
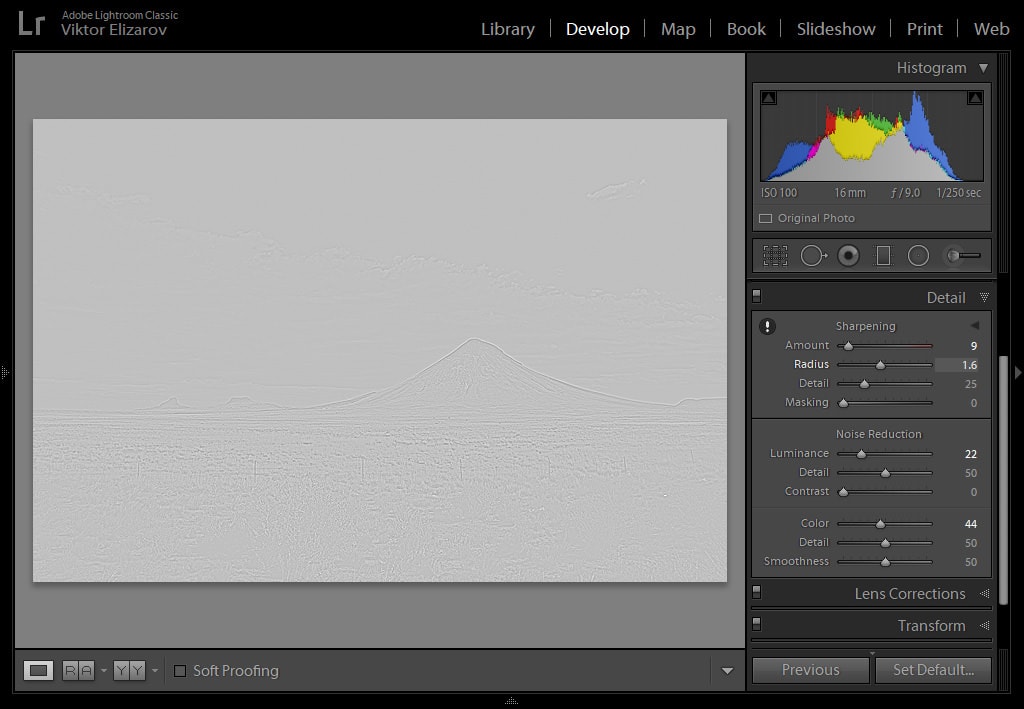
Element Panel
The modifying sliders within the Element Panel show you how to take management of sharpening the picture and lowering any digital noise.
By holding down the Alt/Choice key, you may have entry to the Reset Sharpening and Reset Noise Discount choices.

Visualizing Sharpening Impact
By holding down the Alt/Choice key and shifting the Quantity slider, the photograph turns right into a black and white preview that means that you can higher assess the sharpening results.
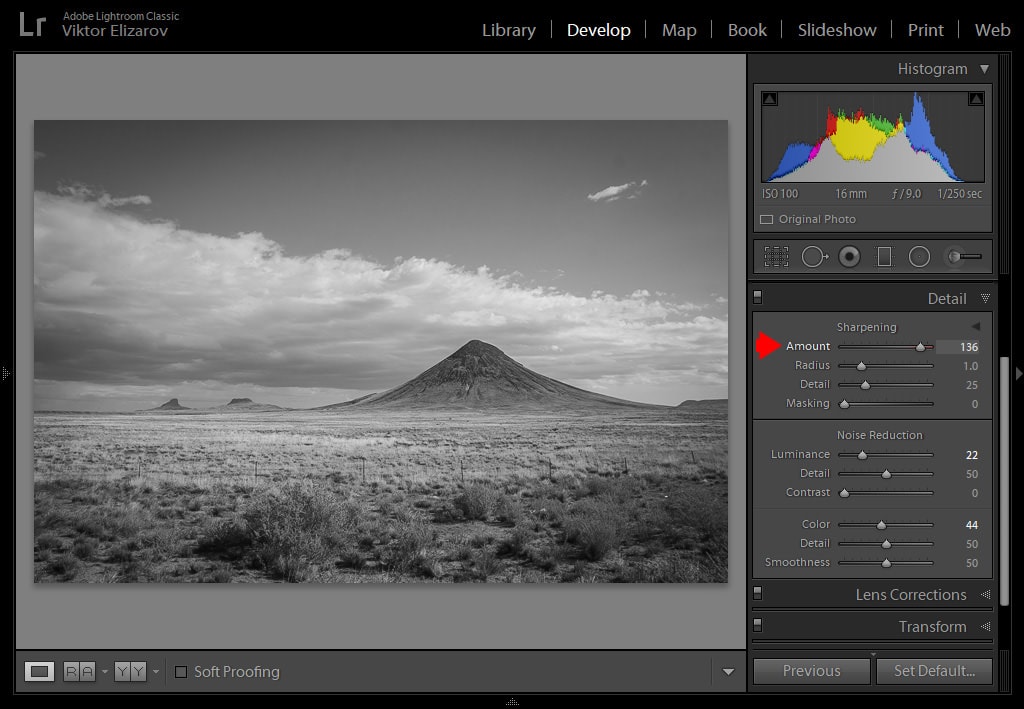
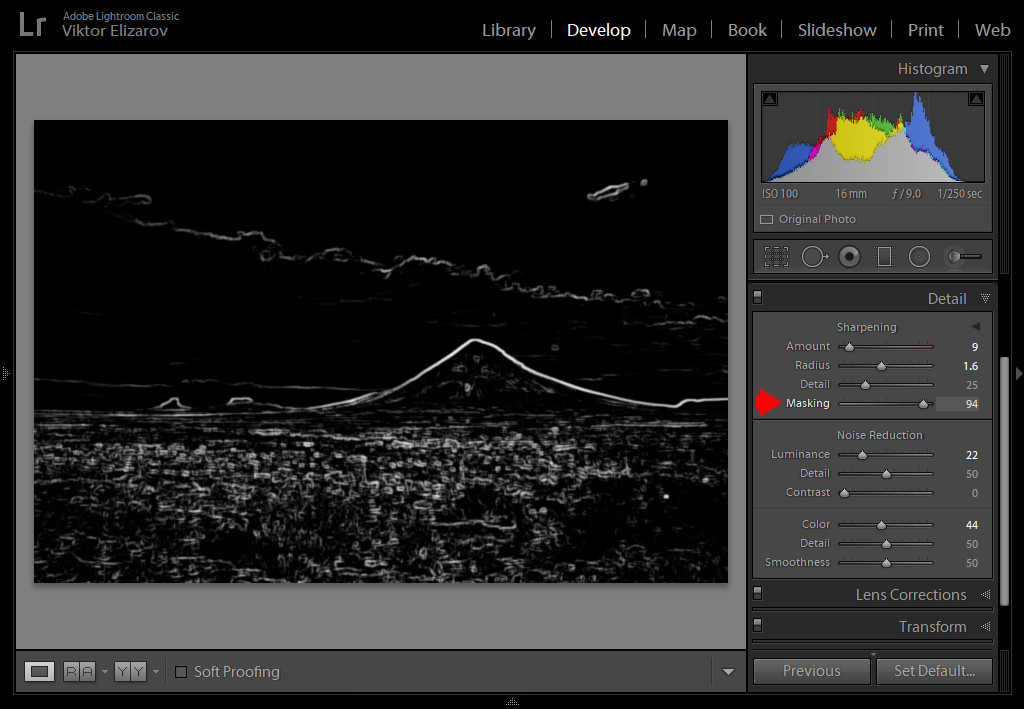
If you press the Alt/Choice key and drag the Radius or Element slider, the picture preview turns to a impartial grey and solely the areas affected by the sharpening are proven in white. That is priceless.
The Masking modifying slider helps you reduce the impact of sharpening by narrowing the affected space. The mixture of the Masking modifying slider and the Alt/Choice secret is essentially the most helpful visible helper in your complete Element Panel. It exhibits the world affected by sharpening in white and retains the unaffected areas in black. That is one of the simplest ways to restrict the sharpening impact to the sides and go away the flat areas just like the sky or water unaffected.
Visualizing Noise Discount Impact
Maintain down the Alt/Choice key whereas dragging the Luminance, Element, or Distinction sliders. This exhibits the picture in black and white so that you could higher consider the noise discount impact.

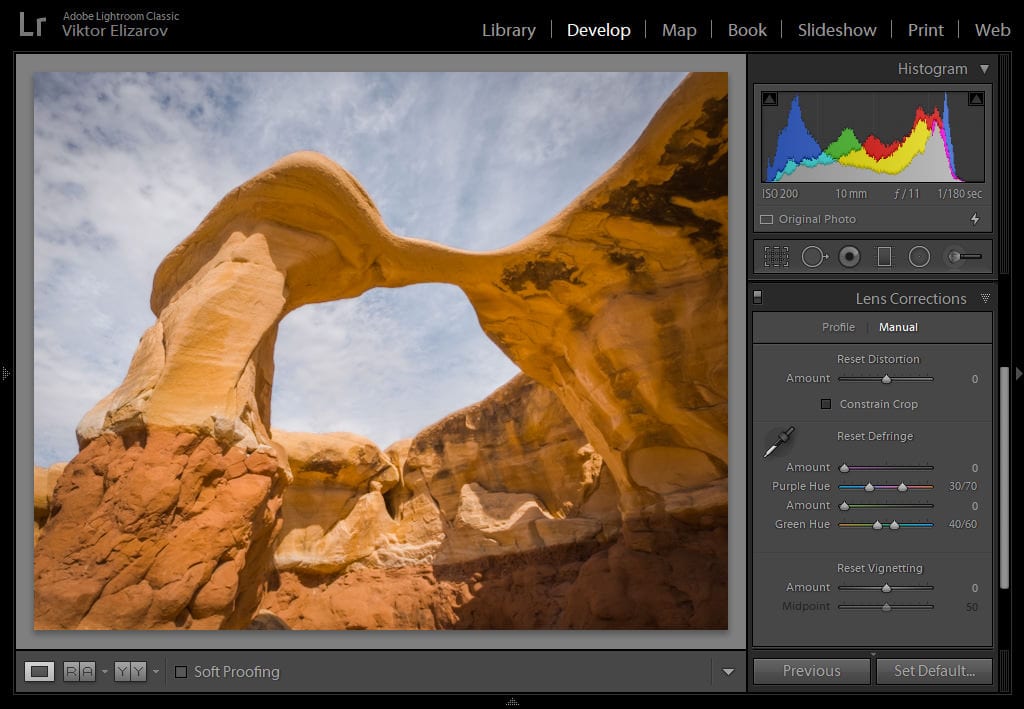
Lens Correction Panel
By utilizing the Alt/Choice keyboard modifier, you may have entry to the next reset choices: Reset Quantity, Reset Distortion, Reset Defringe, Reset Vignetting.

Visualizing Defringing
As soon as once more, the principle energy of the Alt/Choice key within the Defringe part of the Lens Correction Panel is the power to visualise the affected areas. As a rule, the chromatic aberration impacts small areas of the photograph across the edges. It’s simple to overcook defringing and alter the colours of the adjoining areas.
Maintain the Alt/Choice key down whereas shifting the purple or inexperienced Quantity sliders to see the areas affected by the modifying sliders from mild gray to pure black. The unaffected areas of the picture are proven in white.
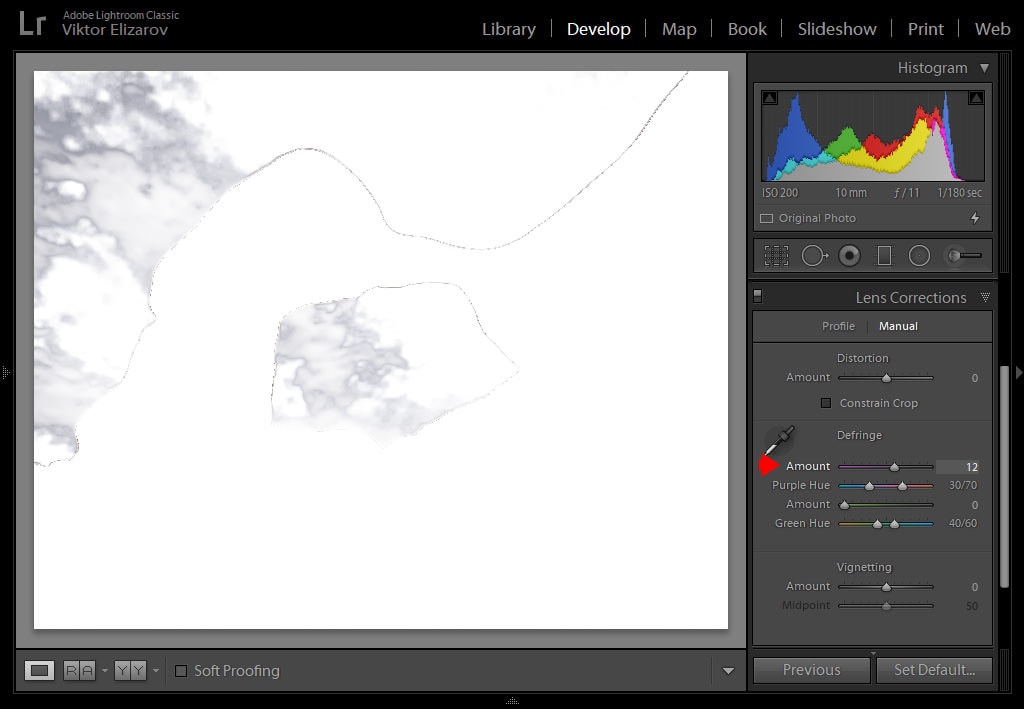
Maintain the Alt/Choice down whereas dragging the purple or inexperienced Hue sliders to visualise the vary of tones affected by the modifying sliders.

Rework Panel
With the Alt/Choice keyboard modifier, you may have the power to reset the modifying sliders within the following areas: Reset Upright and Reset Rework.

Results Panel
The Reset Submit-Crop Vignetting and Reset Grain seem once you maintain down the Alt/Choice key.
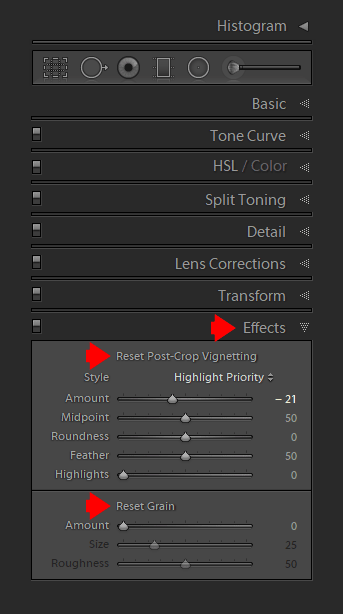
Visualizing Vignetting
Maintain down the Alt/Choice key whereas shifting the Midpoint, Roundness, Feather, or Highlights slider to see the impact of vignetting if the Quantity worth was set to +100 or to -100. This can be a very helpful visualization device to correctly estimate the quantity and form of vignetting that’s required for any given photograph.

Calibration Panel
Maintain down the Alt/Choice key to entry the reset choices.

Crop Overlay
The Alt/Choice key doesn’t invoke the reset choices within the Crop Overlay Panel as a result of the panel has a devoted reset button.
Crop to the Middle
The Alt/Choice key within the Crop Overlay Panel means that you can crop a picture to the middle somewhat than to the sting. This modifier migrated to Lightroom from Photoshop and Illustrator.
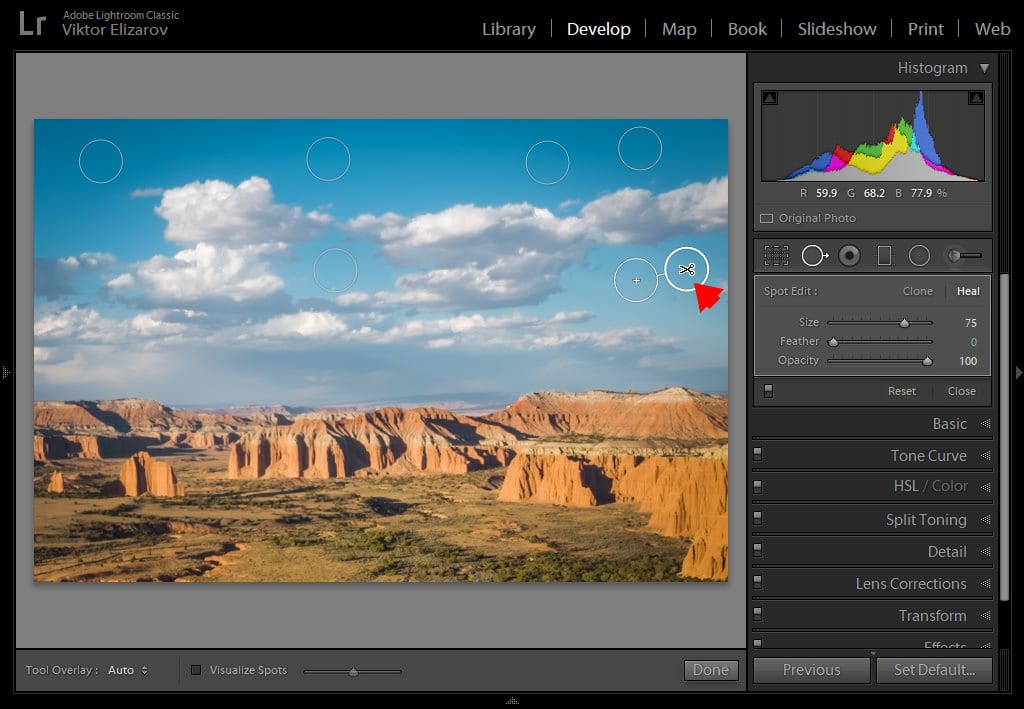
Spot Removing
Within the Spot Removing Panel, the Alt/Choice performs just one perform—it adjustments the cursor from a rounded brush to a scissor icon. This lets you delete any pointless spots by clicking on them with the scissors.
Graduated Filter
Within the Graduated Filter Panel, the Alt/Choice performs two very helpful features past the widespread reset features.

Altering the Path of the Gradient
First, you may maintain down the Alt/Choice key and drag the sting of the chosen graduated filter towards the middle to invert its impact to the opposite facet of the picture. That is extraordinarily helpful.
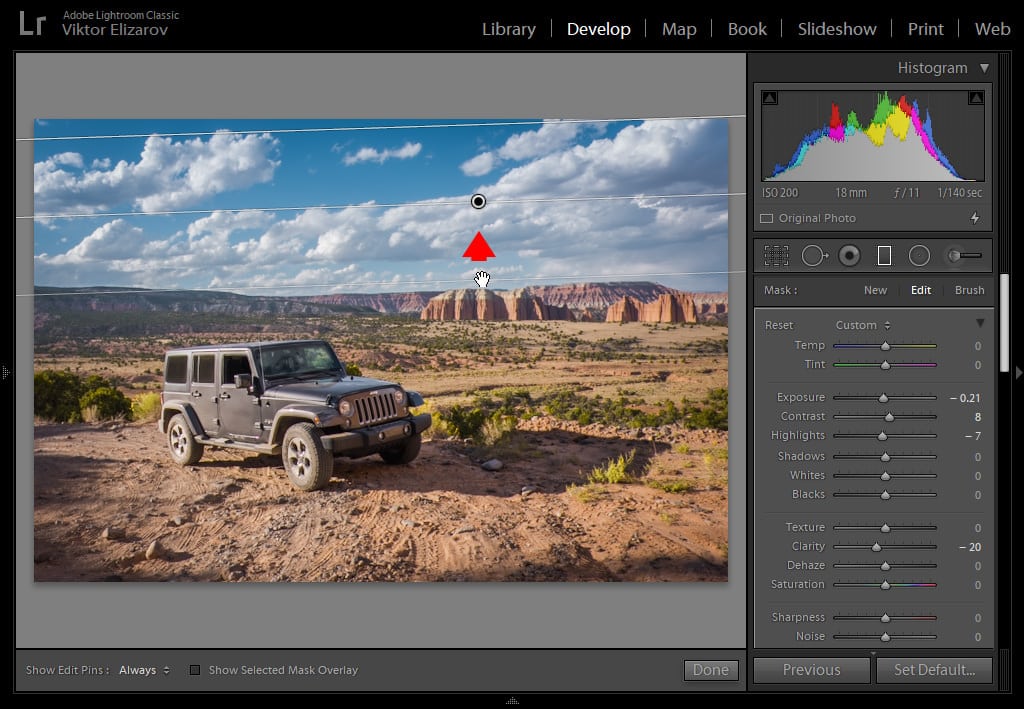
Adjusting Publicity
Second, you may maintain down the Alt/Choice key and transfer the mouse to the middle of the chosen graduated filter to alter the cursor to a two-headed arrow. Now you can drag the mouse to the left or proper to extend or scale back the publicity worth. I take advantage of this perform very often.
Radial Filter
Within the Radial Filter, the Alt/Choice modifier works much like the Graduated Filter. You should use it to reset the 17 modifying sliders to the default worth of zero in a single click on.

Altering Publicity
You too can change the Publicity worth of the chosen Radial Filter by dragging the mouse to the left or to the precise. Don’t forget that it’s essential to press the Alt/Choice key and transfer the mouse over the middle of the filter earlier than you may have an effect on the Publicity change.

Filter Brush
By holding down the Alt/Choice key when the Filter Brush device is lively, it alters its performance in two methods.
First, it adjustments the Impact label to a clickable Reset button for a fast solution to reset all of the modifying sliders to zero.
Switching from Brush to Eraser
Second, it adjustments the filter from the Brush Mode to the Eraser Mode. That is extremely helpful when retouching portraits. You may erase undesirable edits by merely urgent the Alt/Choice key. Plus, you may change the scale of the Brush and the Eraser independently utilizing the ] and [ shortcuts.

Setting the Default Develop Setting
When you are in the Develop Module and press the Alt/Option key, the Reset button at the bottom right corner of the UI changes to the “Set Default…” button.
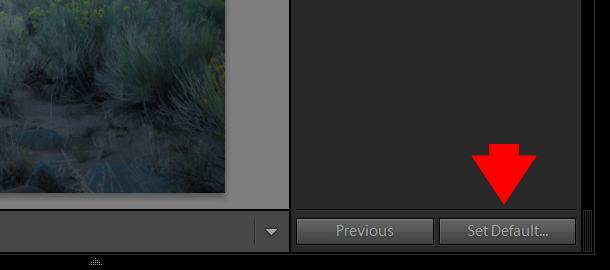
By clicking this, you are presented with the following dialog box:
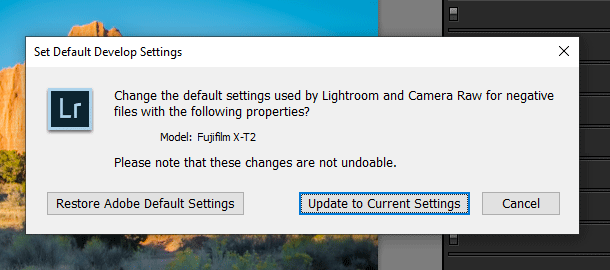
If you click the “Update to Current Settings” option, Lightroom will use the current settings as a default for any photos taken with that particular camera model. In my case, the Fujifilm XT2.
Let’s see when this feature might be useful.
Lightroom does not handle the Fujifilm RAW files very well when applying Sharpening. It produces unnatural, wormlike artifacts. I could set the Sharpening value to zero and hit the “Update to Current Settings” option. From that moment, all my Fujifilm XT2 files will have a Sharpening value set to zero during import. All my Sony images will have the Adobe default value of 40.
I do not use this feature at all.
Library Module
In the Library Module, the Alt/Option key does not produce as many new options or functions compared to the Develop Module.
Solo Mode
Hold down the Alt/Option key and click on the header of any panel (left or right) to set the entire panel to Solo Mode.
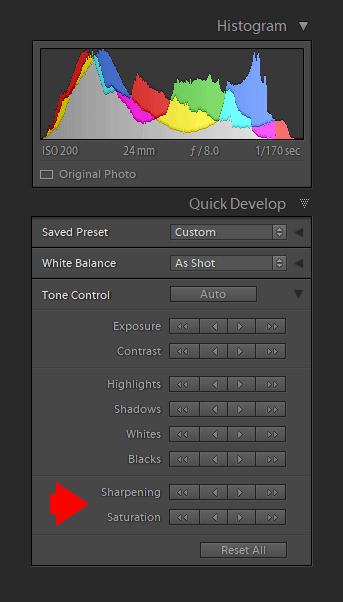
Quick Edit
In the Quick Develop Panel, press the Alt/Option key to access the Sharpening and Saturation controls, which are hidden by default.
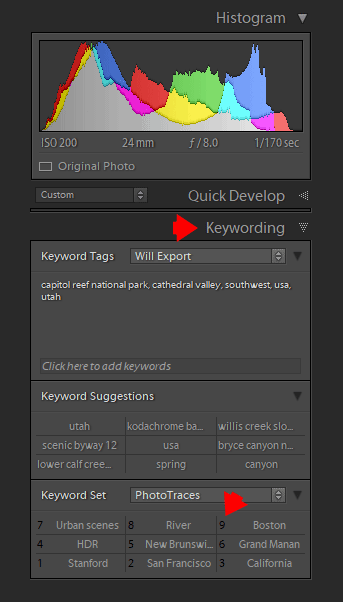
Keywording
Hold down the Alt/Option key to add keywords to a selected photo by hitting the numbers on the keyboard.
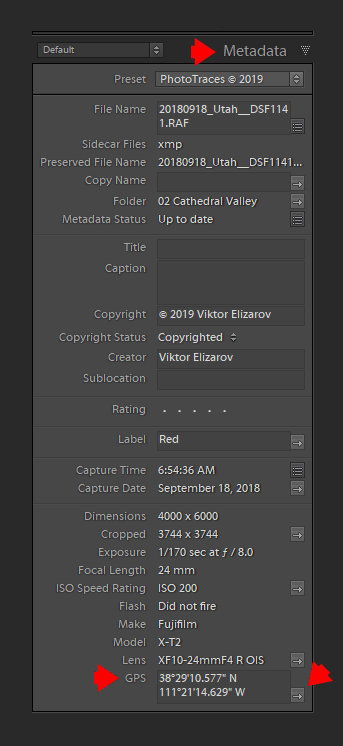
Metadata
Hold down the Alt/Option key and click the arrow next to the GPS field to trigger Google Maps to open in your default browser with the selected location where the photo was taken. Please note that this will not work if the GPS field is empty.
Export Module
The only thing the Alt/Option key does in the Export Module is to enable or disable the Solo Mode.

Conclusion
I consider the Alt/Option Keyboard Modifiers to be some of the most useful and lesser known functions of Lightroom. I do not believe that you have to learn and memorize all of them. Simply adopt the modifiers that are the most useful and impactful to your workflow and stick with them.
Here is a list of my favorites and the ones I use the most often:
- Reset – It is easy to remember and works almost everywhere
- Adjustment Brush – Switches from Brush to Eraser
- Basic Panes – Shows Highlight clippings
- Spot Removal – Deletes unwanted spots